Module 2
Things that Hold Other Things
Project: Custom Container Lid
Yogurt, peanut butter, jelly, mayo—lots of foods come in glass jars or containers designed to hold them. What happens when the foods are gone and those containers are empty? Instead of tossing them into the recycling bin or the trash, let’s use 3D design to find new uses for them.
Time to get creative and upcycle!
We’ll begin by working through a project together.


One way to repurpose a container that holds other things is to make a new kind of lid for it. In this module, we’re going to use SE to create a lid that pushes into your container’s opening.
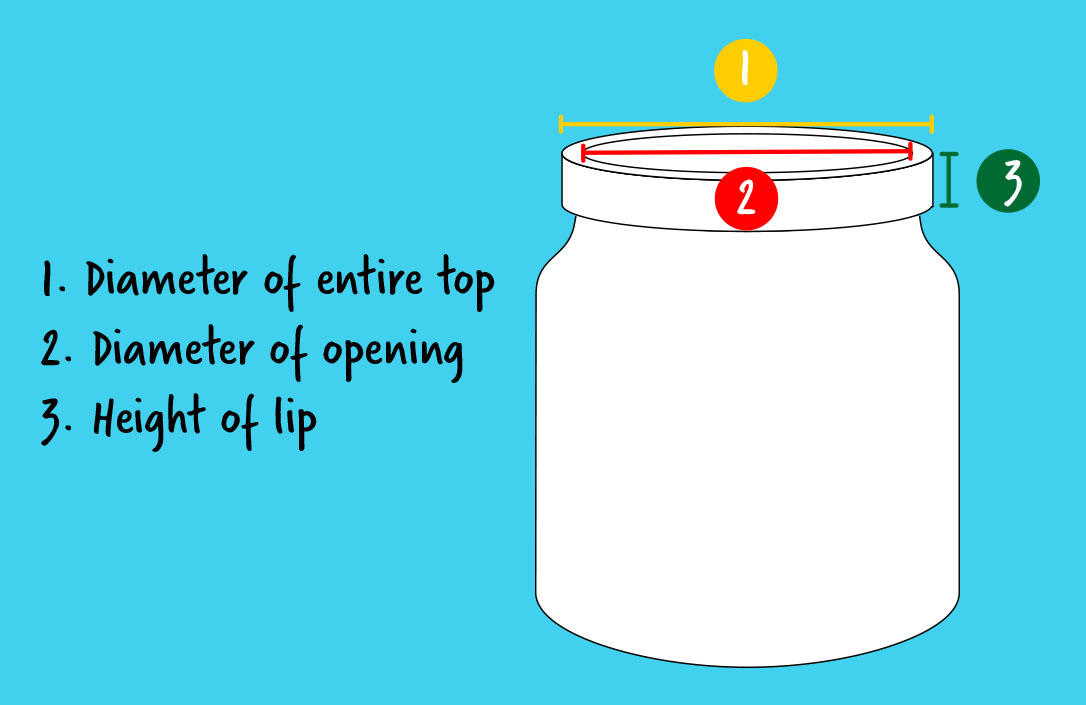
- To start, grab the object that you’re making a lid for and measure the Diameter across the entire top, from outside edge to outside edge.
- Next, measure the diameter of the container’s opening, from inside edge to inside edge.
- Finally, measure how tall the lid should be to seal the top of your container.
Refer to the diagram below for how to record these measurements. We suggest measuring in millimeters, because you’re creating a small object and it will be more exact.
First we need to create our project in Solid Edge.
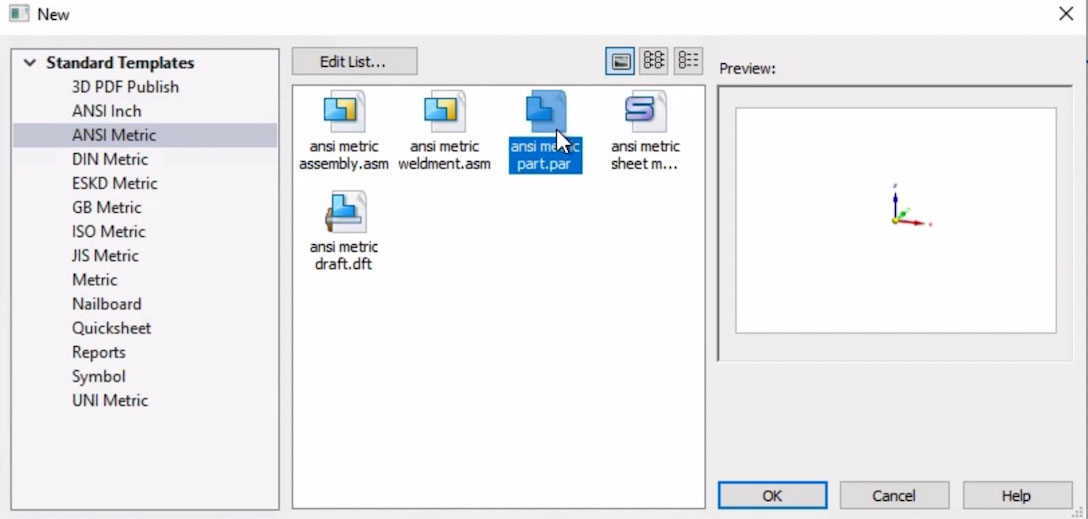
Click New > New (This opens the settings for a new project.)
In the sidebar, select ANSI Metric and then choose ansi metric part.PAR. This option uses metric measurements (millimeters rather than inches).
In the Home tab under the Draw menu click Circle by Center Point Tool.
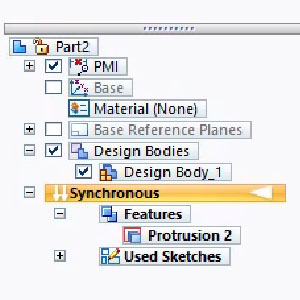
If it isn’t already on, enable the Base Reference Planes by clicking the checkbox under the Pathfinder.
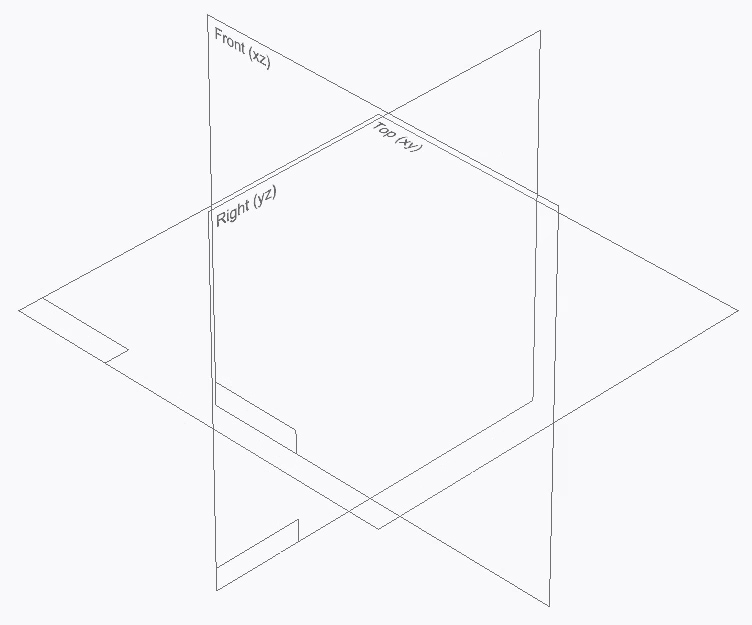
Let’s lock onto the Top (XY) plane to ensure we’re drawing in the correct location within the 3D space. Hover over the plane labeled Top (XY). A yellow border will appear. Press F3 or click the small yellow lock icon to lock onto the Top (XY) plane.
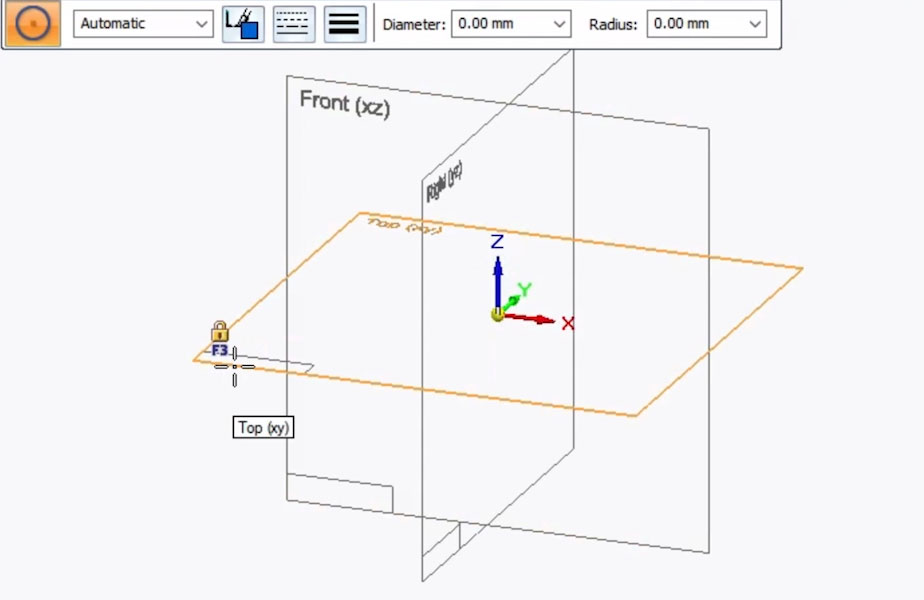
Tip: to unlock from the plane you’re working on, press F3 or click the blue lock icon in the top right.
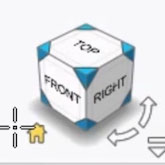
Switch to the Top View of your design by clicking the top face of the Viewcube:
Let’s create a sketch of a circle to make the base of the new lid.
Refer to the measurements you made of your container. In our case, we measured the outer diameter of our object at 56 mm and the inner diameter (the opening) at 50 mm.
Tip: When it comes to printing something that is meant to fit onto or attach to an object, it’s important to understand Tolerance. Every 3D printer has its own particular tolerance, meaning that the objects it prints might come out with slightly different dimensions from what you designed.
This means that it’s a good idea to round up (or down) by a millimeter or two when designing your lid, depending on your particular printer’s tolerance, to ensure it will still fit, even if there is variation.
In our case, knowing the tolerances of our printer, we added one millimeter to our outer measurement (making it 57 mm) and subtracted two millimeters from the inner measurement of the opening (making it 48 mm). This way the material that fits in the hole can expand by two millimeters in the printing, and still fit in our glass.
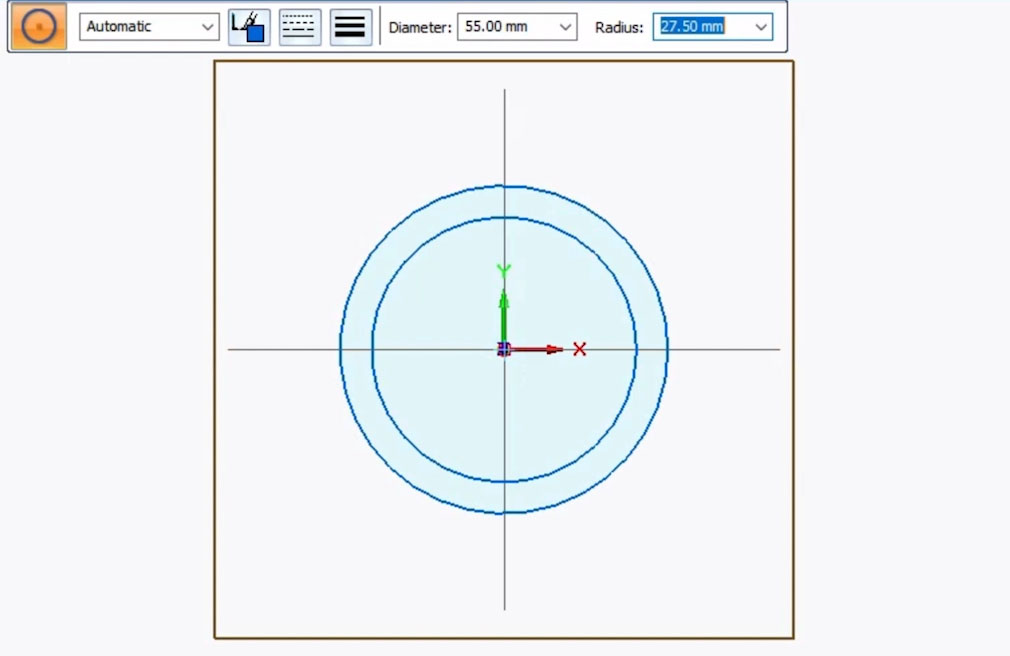
Time to draw the outer rim of the lid.
- Left-click in the center of the screen to place the center of your circle.
- Enter the dimensions of your lid and use the Tab button on your keyboard to see the shape with your desired dimensions.
When using the Circle by Center Point Tool, you can enter your measurements by typing them in directly. For whole numbers, the value can be typed as such. For half-measurements, though, you have to use the decimal value. For example, if you want to enter 20 ½ mm, type in 20.5. For our print, we’ll make the diameter of the outer circle 57 mm (again, accounting for our printer’s tolerance.)
- If needed, press Enter to confirm the dimensions.

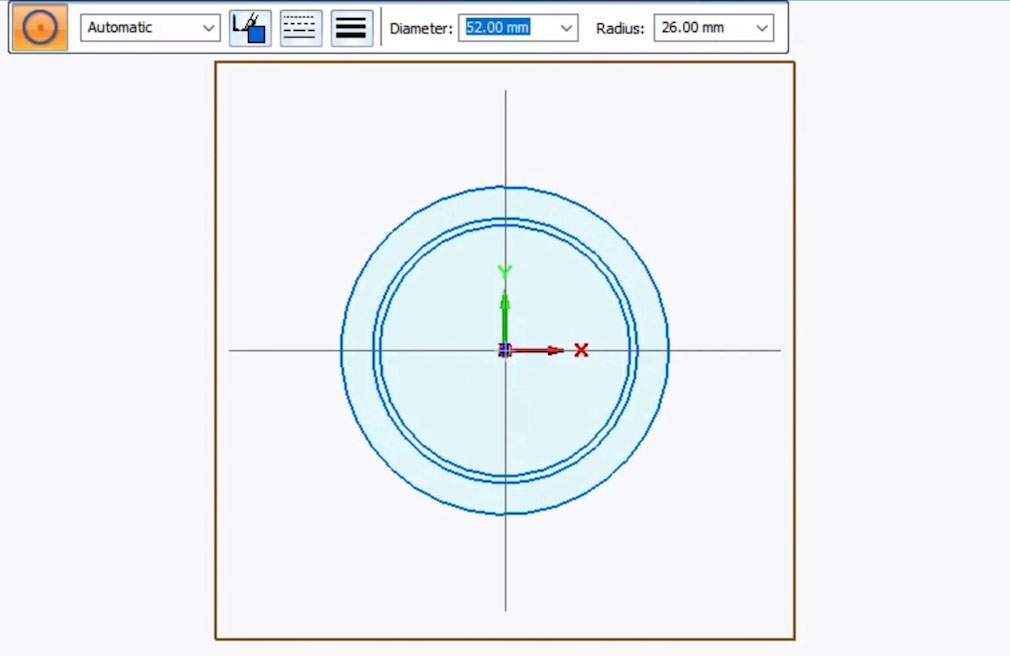
Now we’ll draw the inner circle of the lid.
Using the same center point as the outer circle, create a second circle with a diameter of 48 mm. This creates the part of the lid that presses into the opening of our container.
Tip: if your new circle automatically appears with the same dimensions as the first circle, you can adjust the diameter measurement in the minibar at the top of the screen. Or switch to the Select Tool, then back to the Circle by Center Point Tool to clear the settings. Hit Undo if you make any mistakes. To Delete, select the edge of the sketch and hit function + delete on the keyboard.
Finally, create a third circle, again using the same center as the two other circles, with a diameter of 45 mm. (This circle should be 3 mm smaller than your previous circle).
This third circle will be used to hollow out the part of our lid that presses into our jar, saving us from printing unnecessary material.
Before we begin extruding to make the lid 3-dimensional, you’ll want to create a small tab on the outermost rim so that you can easily pop the lid off.
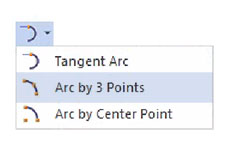
- To do this, select the Arc by 3 Points Tool. Find this tool under the Home tab, Draw menu > Tangent Arc Drop Down (in the top middle) > Arc by 3 Points Tool.
- Plot the first point of your arc by clicking the outermost circle’s edge (at any spot). The outline of the entire circle should turn yellow.
- The second point you select will determine the size of the tab. To set it, click again on the outermost circle’s edge. Experiment with different distances from your first plotted point to decide how big you want your tab to be.
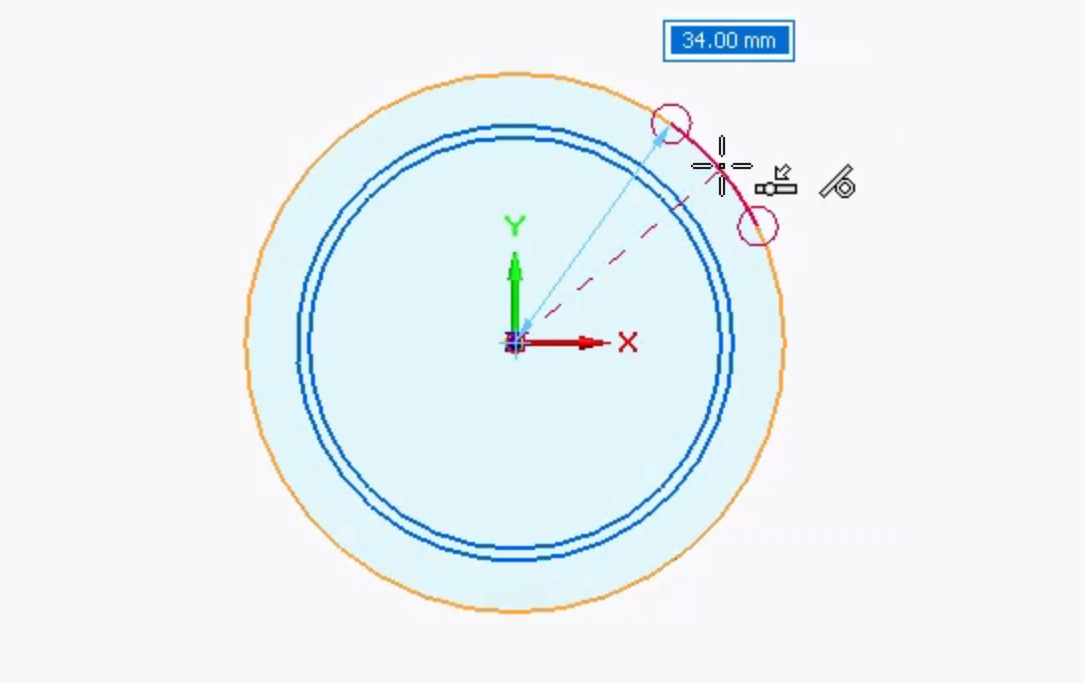
- Pass your cursor between the two points as you mouse outward from the circle. This movement will show an arc previewing the shape of the tab. Play with the arc size until the tab seems right for pulling off the lid.
- Click to place the third and final point. Once you’ve closed the shape, it will turn blue.
- Press Escape.
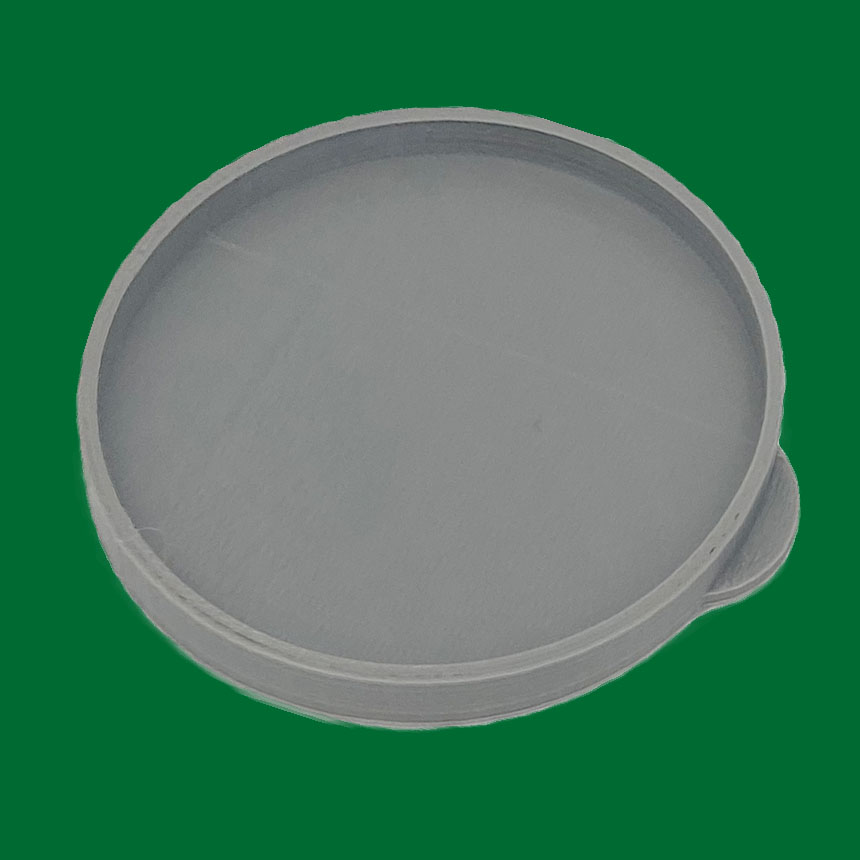
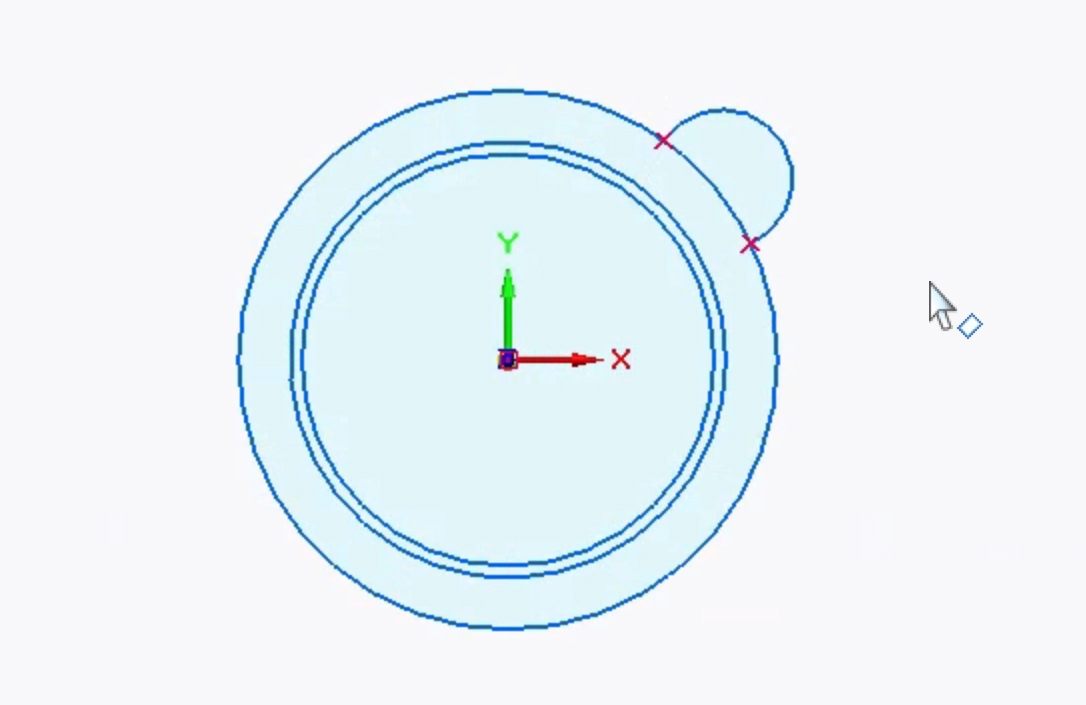
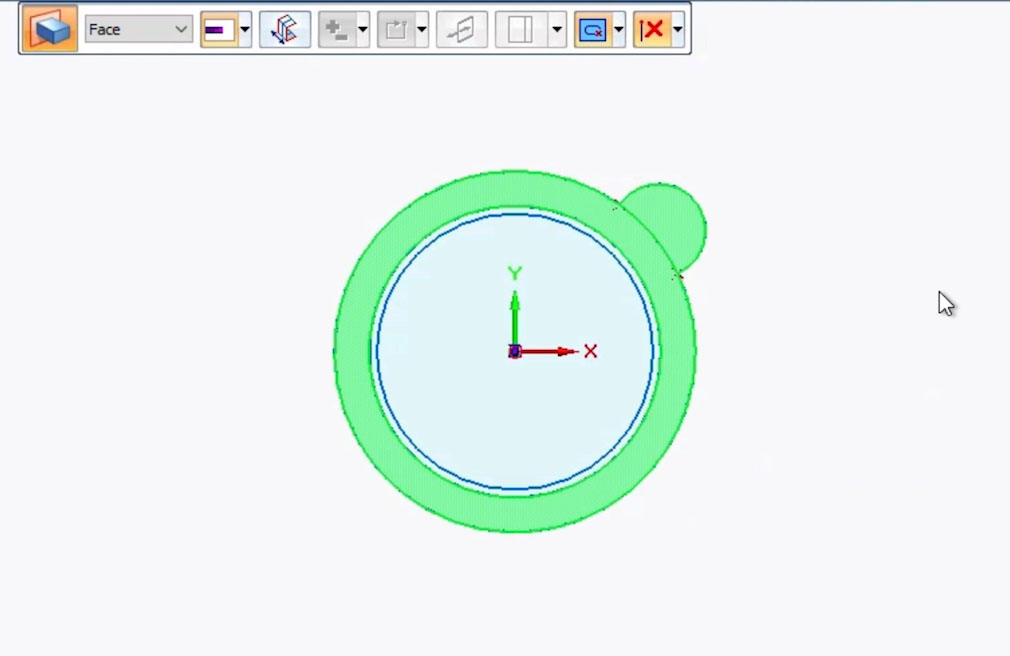
At this stage of the process your design with the circles and the tab should look something like this:
Now comes the exciting part—turning your two-dimensional sketch into a three-dimensional object! To do this, you’ll be using the Extrude Tool. Extruding is the process of lifting the face of a two-dimensional sketch so that it creates a three-dimensional object. The Extrude tool can add or remove material from a 3D object.
We’ll begin by creating the top part of the lid. Under Home tab > Solids menu, select the Extrude Tool.

When using the Extrude tool, a mini toolbar will appear next to the Pathfinder.

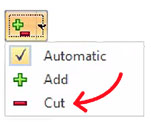
- Make sure that the red, white and blue Extrude - Symmetry button is OFF. (We want to extrude in only one direction. Extrude – Symmetry extrudes in two opposing directions at once.)
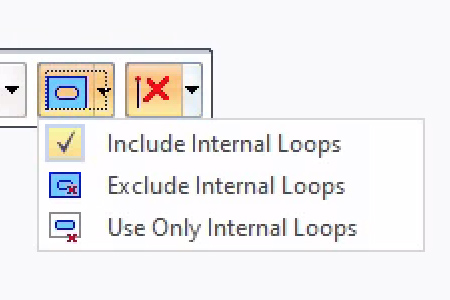
- Also within the toolbar, make sure that the second to last item: Extrude - Internal Loops is set to Extrude - Exclude Internal Loops.
This option is so that when you extrude, you can determine whether or not your design will be affected by other lines or sketches touching or on top of the face you’re extruding.
In this case, you’re creating the top part of your lid, so you’ll want to exclude internal loops to keep the innermost circle from affecting the process.
- Select the face of the outermost circle.
- While holding Shift, also select the face of the tab you created. Both should highlight green. Confirm that Symmetry is OFF.
- Hit Enter.
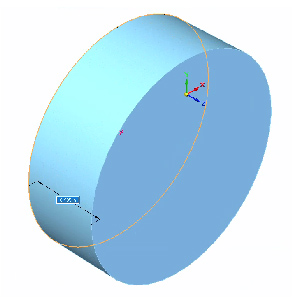
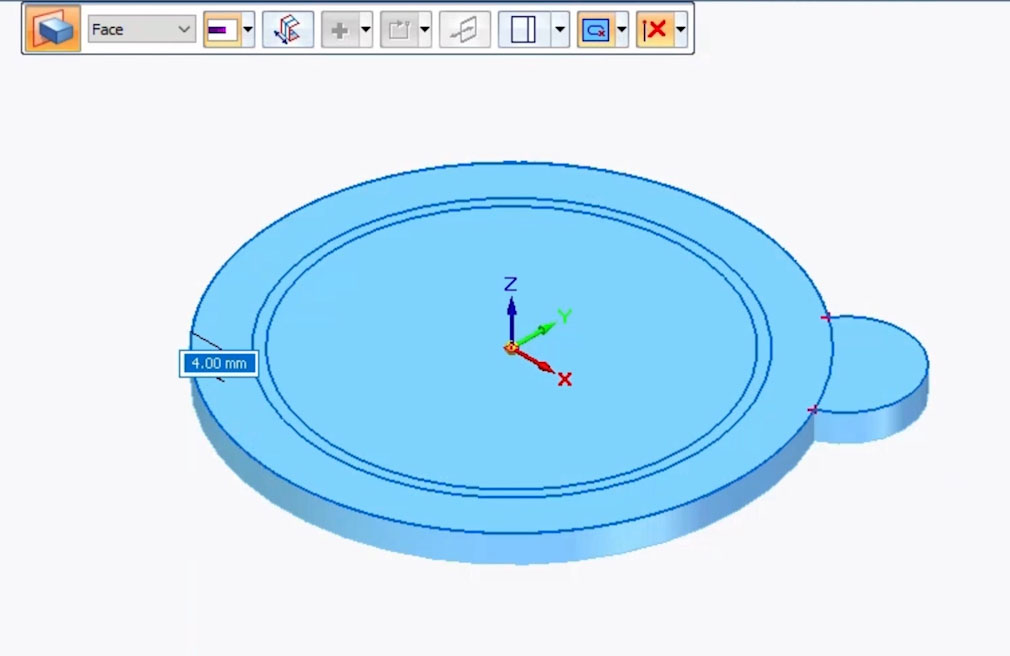
In the Viewcube, switch to Home View so you can see your work in 3D.
- Drag your mouse down to extrude downwards by 4 mm. You can also set the extrude measurement by typing 4 and hitting Tab. This will create the top of your lid.
- Hit Enter to lock in the measurements.
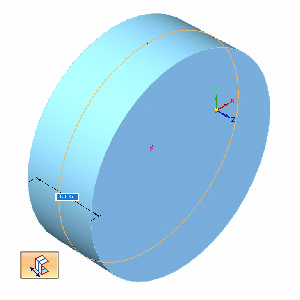
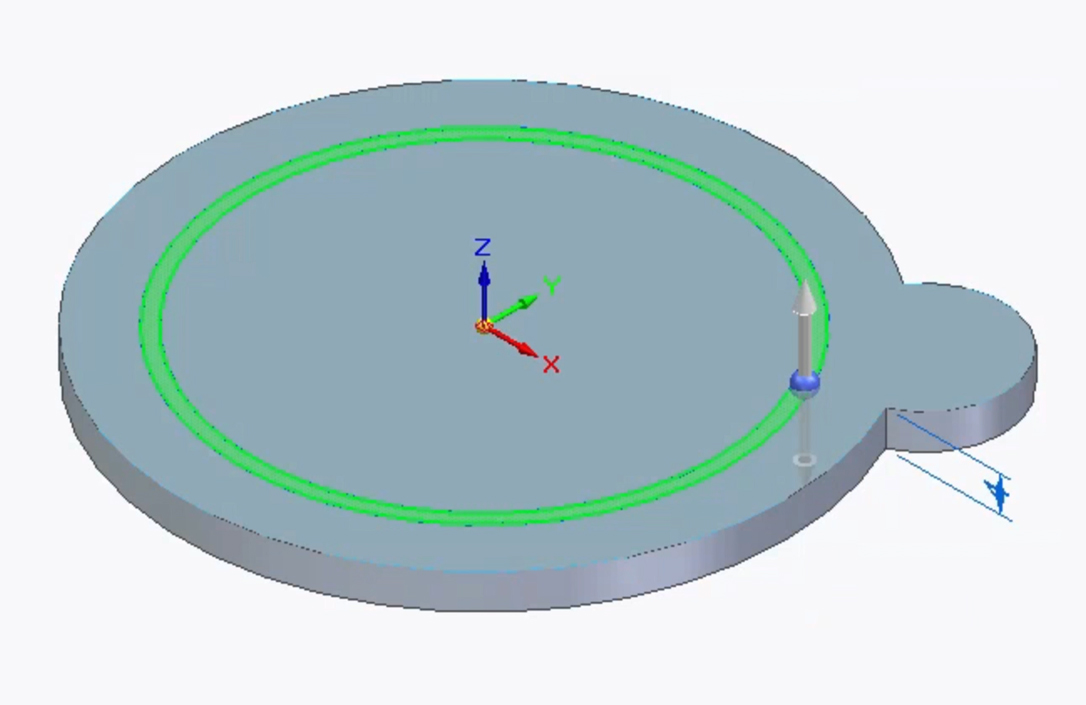
Next you’ll create the part of the lid that will push into the container opening.
- Use the Select Tool to select the face created by the two innermost circles that you sketched. For reference, the image below shows where to select:
- Select the Extrude Tool.
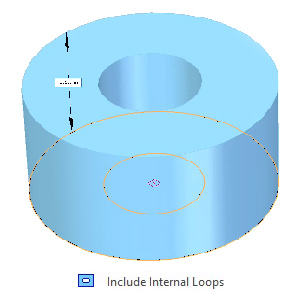
- This time, within the toolbar, make sure that the Extrude - Internal Loops is set to Extrude - Include Internal Loops.
In this case you want to include Internal Loops so the Extrude takes into consideration and subtracts out the third and innermost circle that we drew.
- If the tool is not already extruding, hit Enter to begin.
- Drag your mouse up to extrude by 5 mm. Or type in 5 and hit Tab. This dimension is the height of your container’s lip that we measured in the beginning.
- Hit Enter to lock in the measurement.
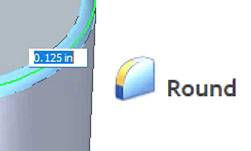
Next, you’ll want to round the edges of the part of the lid that pushes into the container’s opening.
- Under Home > Solids > select the Round Tool.
- Select the edges (as shown highlighted in the diagram below) one at a time.
- The measurement of the Round Tool will be recommended by Solid Edge. In our case, 1.27 mm works well so we’ll use that.
- Hit Enter to lock in the measurement.
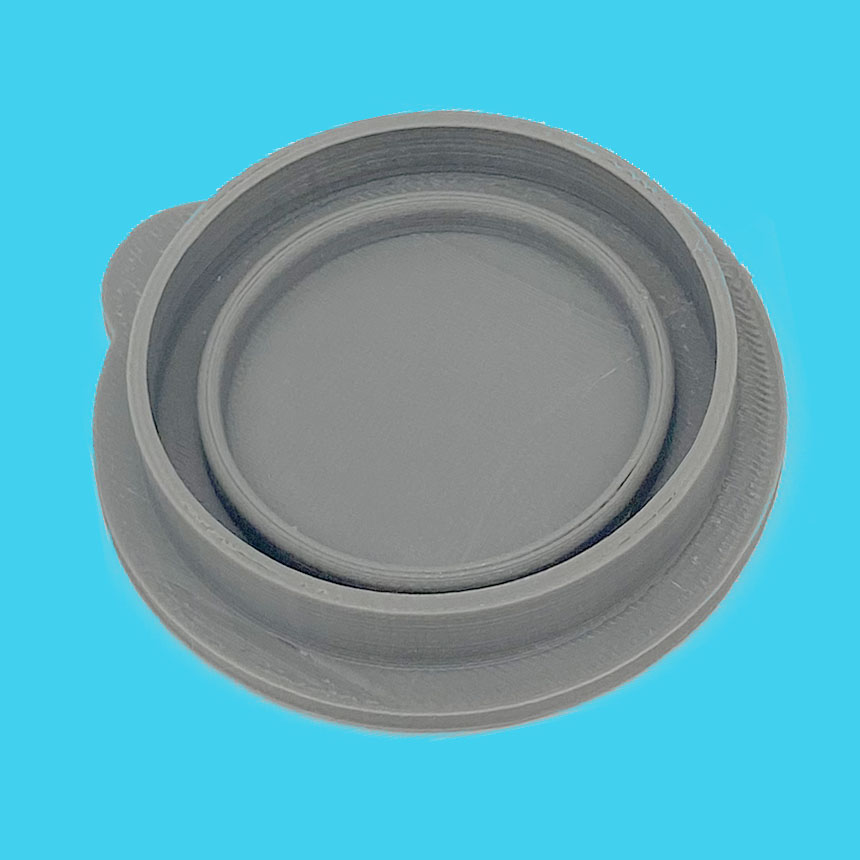
You did it! You’ve designed a reusable push-in container lid! Go print that baby and test it out!
IMPORTANT FACT: Your first printed lid probably won’t fit. In fact, your first 16 lids might not fit! Just remember, it will most likely take multiple tries to find the best possible measurements to fit your container well. Don’t be discouraged. Don’t give up. Failure is a natural and extremely helpful part of the design process. Why? Because every mistake teaches you important lessons about how to improve your approach. So hold onto all your wonky prints. They’re hard evidence that you’re becoming a real designer!
Okay!
Now You’re up!
You’ve mastered the push-in lid. Now think back to the games you played in the pre-module. What other ideas can you explore to upcycle your container?
Team up with a partner and see how many new design ideas you can come up with together. While you’re brainstorming, consider these questions:
- How do the contents of the container affect the type of lid you design?
- What can you add to or remove from this design to create something new?
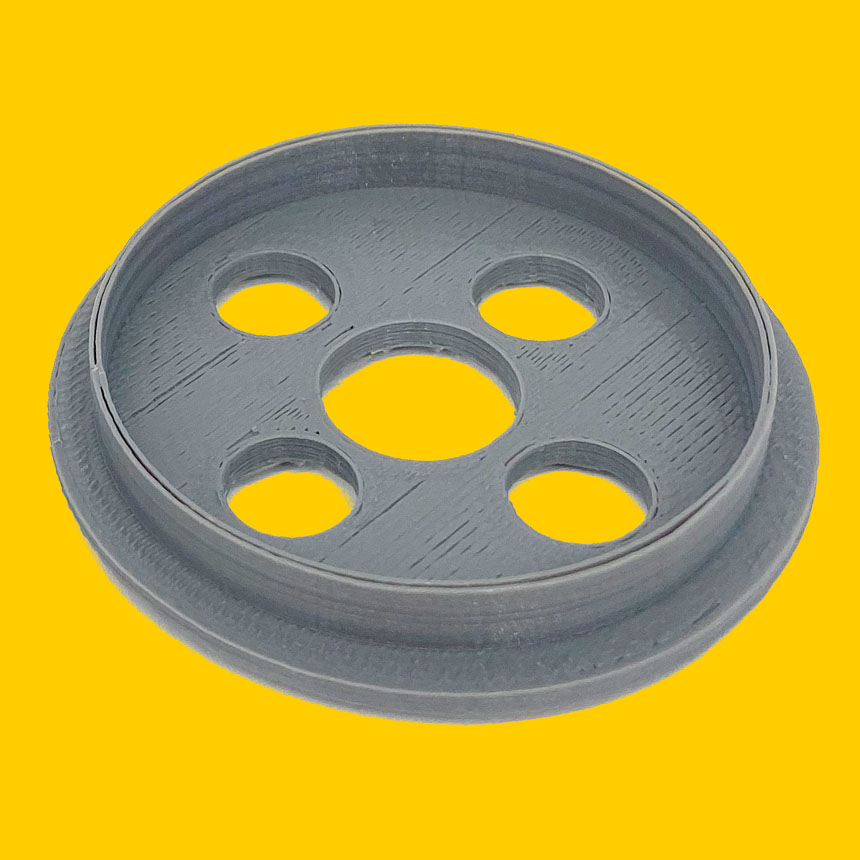
- What if you set the Extrude Tool to Subtract and make holes in the lid. How does this change the function?
- How would you make a lid that grips the outside of the container, instead of pushing in? See the LIP TOOL for ideas.
- How would you make the lid stackable?
- What purpose could you find for your container other than to hold other things? What could you design to turn it into something with a completely different function?
How did it go? Submit your feedback.